How To Apply Makeup

How to Apply Makeup: A Beginner’s Guide
Wondering what it takes to apply makeup like the pros? The secret lies in not just how you apply your makeup, but the makeup and tools you have in your kit too. Don’t worry, we’ve covered it all for you in this detailed guide. Read on and you’ll learn exactly what makeup you need, what the best tools are for the job, and all the need-to-know application techniques for nailing your look every time.
Types of Makeup
It’s easy to get overwhelmed when it comes to curating your own makeup supply. After all, there are thousands of different types of makeup. So how do you know which ones are actually worth investing in? While it’s tricky, we think there are a few essentials every vanity bag should have.
12 Makeup-Bag-Essentials
- Primer
Use a primer underneath your makeup, but after your skincare, to create a flawless base for makeup application. Not only will it help your makeup last longer, but choose a formula that addresses your common skin concerns and it can also help to firm, brighten, or even out your complexion too.
- Foundation
Foundation is the base (aka foundation!) of your makeup look. You can use it to even out your skin tone, blur imperfections, and brighten your complexion.
- Concealer
Dab some concealer over blemishes, spots, and hyperpigmentation to subtly hide them. Look out for color-correcting concealers that help to rebalance your complexion – goodbye dark circles and redness!
- Blush
Available in a range of coral, peach, pink, and scarlet shades, there’s a blush to suit all skin tones. Use it to add a natural glow and a flush of color to your complexion.
- Bronzer
Bronzers are used to add a radiant, lit-from-within glow to your complexion, or to contour and add depth to your look. They’re usually a few shades darker than your natural skin tone to add warmth.
- Highlighter
A few sweeps of highlighter over the high points of your face (forehead, nose and cheekbones) help to brighten your complexion. You can also use it to emphasize your eye area by applying it to the inner corners of your eyes and brow bone.
- Mascara
Curl, lengthen, thicken and darken your lashes with mascara. Applied to your top and bottom lashes, mascara helps to make your eyes pop too.
- Eyeshadow
Add an eyeshadow palette to your makeup bag and you’ll be able to create a range of looks. Usually applied to your eyelids – but used as an eyeliner along your upper and lower lash line – eyeshadows help to brighten and widen your eyes.
- Brow Pencil
There’s a range of brow formulas on the market – pencils, mascara, pomades, fine liners – and which one you choose depends on the look you want (and the amount of time you want to spend on your brows!). Pencils, pomades, and fine liners are great for filling in sparse brows, while brow mascaras help to tint your eyebrow hairs.
- Lipstick
Lipsticks add color, texture, and tone to your pout. And they come in a few different formulas too – lipstick, lip gloss, matte lipstick, and liquid lipstick. Matte is smooth and dries matte (not shiny). Lipgloss and liquid lipstick have a satin-like finish, while lipstick is a little more creamy.
- Lip Liner
If you’re applying any kind of lipstick, a lip liner is essential for creating more fullness and definition, while giving you control over your lipstick application too. Find a shade that closely matches your lipstick for the best results.
- Setting Spray
Finally, no makeup look is complete without a setting spray. A few spritzes of one of these and it’ll hold your makeup in place all day long, not to mention give you a healthy-looking glow too.
Makeup Brushes
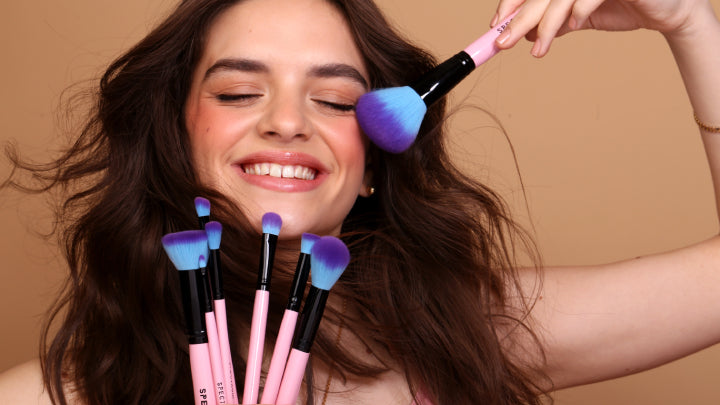
Having a good set of makeup brushes in your kit is essential. But makeup brushes are specifically made for use on different parts of your face (and for different makeup formula types too!). This might sound a bit complicated, but it’s actually really simple once you know the different types of makeup brushes. Allow us to explain!
Face Brushes
From effortlessly blending foundation to adding a pop of highlighter, these are the essential face brushes your kit needs.
Powder Brush
With soft bristles, a powder brush is a versatile brush for all kinds of powder makeup – blush, bronzer, setting powder – and therefore a must-have.
Foundation Brush
There are different types of foundation brushes depending on the results you’re after. An oval foundation brush helps to apply and layer liquid formulas, while an angled foundation brush helps to blend and buff foundations.
Blush/Bronzer Brush
You’ll need to use a smaller brush to apply blush or bronzer onto your cheeks. An angled cheek brush is great for powder formulas, while a multi-complexion brush perfectly blends liquid formulas.
Highlighter Brush
To add highlighter onto the high points of your face, use a tapered brush or thin brush with soft bristles (like our magic wand brush). They’re great for applying product to smaller areas.
Eye Brushes
Grab yourself a set of eye brushes and you can buff, blend and define to your heart’s content.
Eyeshadow Applicator
Eyeshadow applicators have come a long way since the oval-shaped sponges we used in the 00s. Now, color applicator brushes have short, dense and round bristles to pack pigment onto your lid or create a smoky finish.
Blending Brush
Blending is the key to a sleek eye look, especially when you’re applying multiple colors to your lid – it’s how you get them all to perfectly blur together. A tapered blender will help to not only blend the shadow on your lid, but get the product into your crease too.
Angled Liner Brush
A liner brush is a must-have if you want to apply eyeliner to your upper and lower lash lines. The flat, angled bristles help you apply the product exactly where you want it.
Smudger
If you want to nail that smoky-eye look, a smudger brush will be your new favorite tool. The feathered bristles help to blur and “smudge” your eyeshadow to create that hazy effect.
Brow Brush
Using a pomade to fill in your brows? A brow styler will have an angled brush head to push gel, cream, and powder formulas into your brow area. Most have a spoolie on the end so you can comb the product through your eyebrows for a softer look.
How to Apply Makeup
Follow our step-by-step guide on how to apply makeup and you’ll have mastered the skills you need in no time.
Step 1: Preparation Is Key
Make sure you’ve cleansed, moisturized, and primed your face. This will help your makeup to sit properly on your face and last longer throughout the day.
Step 2: Set Up Your Space
Applying your makeup in the right environment will help you to relax. Make sure you’ve got enough room to apply your makeup, a mirror within easy view, and that you’re facing natural light.
Step 3: Start With Your Eyes
If you’re applying eyeshadow, you should start here first. It’s much easier to clean up any fall-out (loose eyeshadow powder) that falls onto your cheeks before you’ve created your base.
Step 4: Conceal Any Blemishes
Dab concealer over blemishes, uneven areas and hyperpigmentation. Blend it with a small, tapered brush.
Step 5: Apply Your Foundation
Start with a small amount first, you can always build it up to achieve a fuller coverage if you want. Use a flat foundation brush to apply it to your skin, then blend it with a buffing brush.
Step 6: Add A Pop of Color
Here’s where you’ll want to add color and warmth to your skin. Add blush or bronzer (or a mix of both!) onto the high points of your face for a radiant glow.
Step 7: Highlight Your Cheekbones
Take a smaller powder brush (a tapered one works well) and focus on patting some highlighter onto your cheekbones, down the center of your nose, and under your brow bone.
Step 8: Fill In Your Brows
Take an angled eyebrow brush and push your chosen brow product into your brows, following their natural shape for the best results. Brush the product through with a brow comb afterwards for a softer finish.
Step 9: Add Mascara To Your Lashes
Optional step: Curl your lashes first with an eyelash curler. Then, starting at the base of your lashes, wiggle the mascara wand up your lashes to ensure an even coat. Repeat for a thicker, more dramatic evening look. Then sweep the wand over your bottom lashes.
Step 10: Clean Your Brushes
There’s nothing worse than applying makeup with dirty brushes. Not only will they transfer previous colors you’ve used onto your face, but they can also harbor bacteria – causing nasty infections and breakouts. So be sure to give them a good clean after each use with a brush cleaner.


